Belt Replacement on Whirlpool
- Belt Replacement on Whirlpool - November 21, 2019
- Error Codes of Washer - November 12, 2019
- Cleaning a Self-Cleaning Oven - October 24, 2019
How to replace dryer belt
If you face the issue of the dryer belt replacement, we would like to assure you that this process is not so complicated and frightful as it seems to be.
In case you have any doubts about condition of the dryer belt, consider the following issues that indicate the belt is faulty indeed and needs to be replaced:
· The dryer doesn’t start. After you have verified other sources of this problem like lack of electricity, door sensor issue etc, the defective belt is likely to be a problem.
· Dryer stops spinning before the garments are fully dry. The belt is not the reason of the problem if after a while it keeps turning on. Check the sensor that is most likely to be a cause.
· You hear the thumping belt noises. It points to the belt that is about to be broken.
· Drum is not functioning. In case of the motor is running, but the drum doesn’t demonstrate any motion, it is rather obvious the dryer is faulty or is not attached.
The tools you will need
To convey the successful whirlpool dryer belt replacement, you will definitely need the following tools:
· Putty knife
· 5/16th nut driver
· Screwdriver
· Screws
· Vacuum cleaner
· Lightweight gloves (wear them while attaching the belt into the motor shaft)
Let the tools be within reach when you need any of them while repairing the dryer. Now you are completely ready to replace the dryer belt.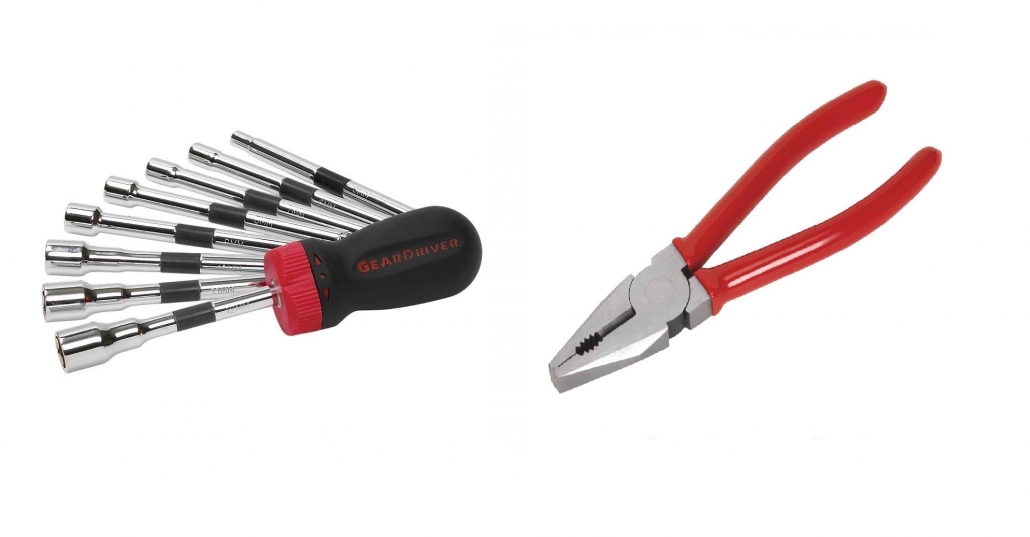
Step by step process
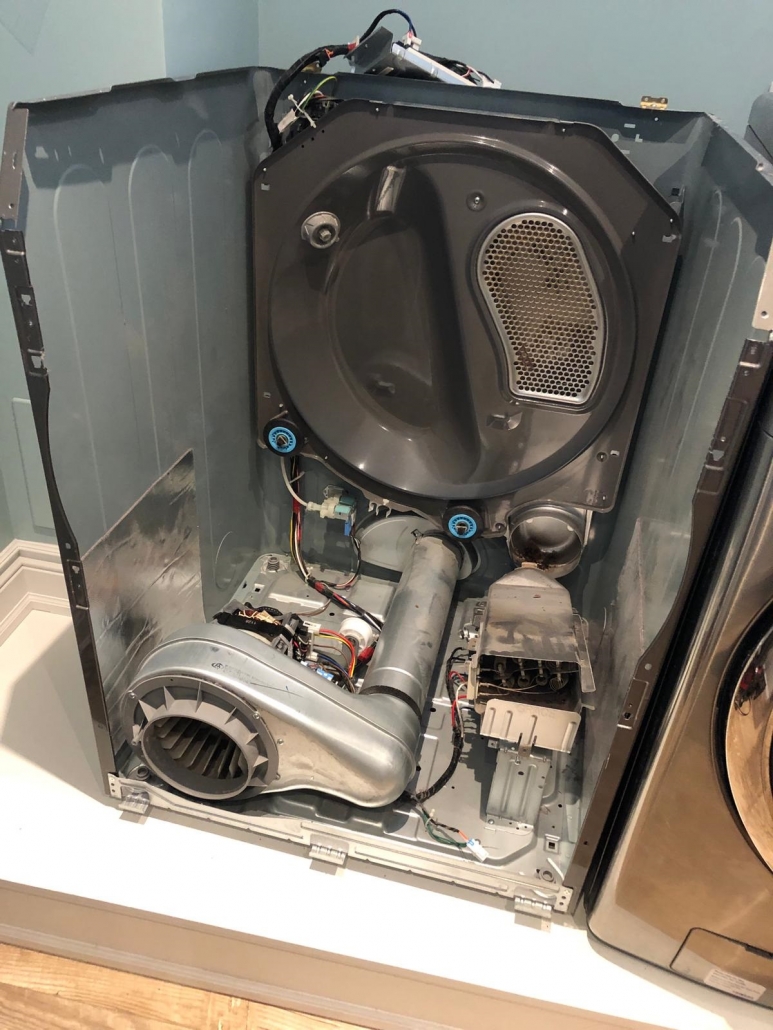
Dryer Belt Replacement isn’t a simple process. Here is the efficient step by step guidance how to discard the defective dryer belt and to place the new one. It won’t take much time to fulfil this job, but it will definitely save your money since you won’t need the qualified professional to help you. First of all, make sure you have disconnected the dryer from the electric power.
Step1
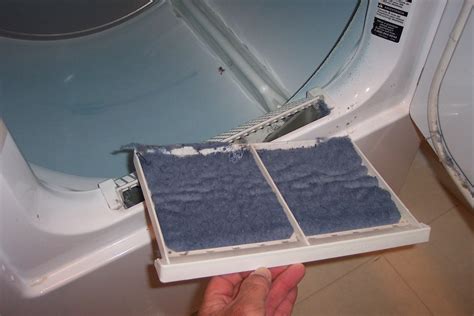
We will start from discarding the lint filter. To fulfil this, you will need to use the 5/16th screwdriver. Remove two screws which are located under the lint filter.
Step2
Between the top and the front of the dryer you will find the small opening. Slide the putty knife into it and pop the top up. Perform the same on the other side.
Step3
In each upper corner of the interior of your dryer you will find two screws. Unscrew them and put them aside to be used later. Flip the top out.
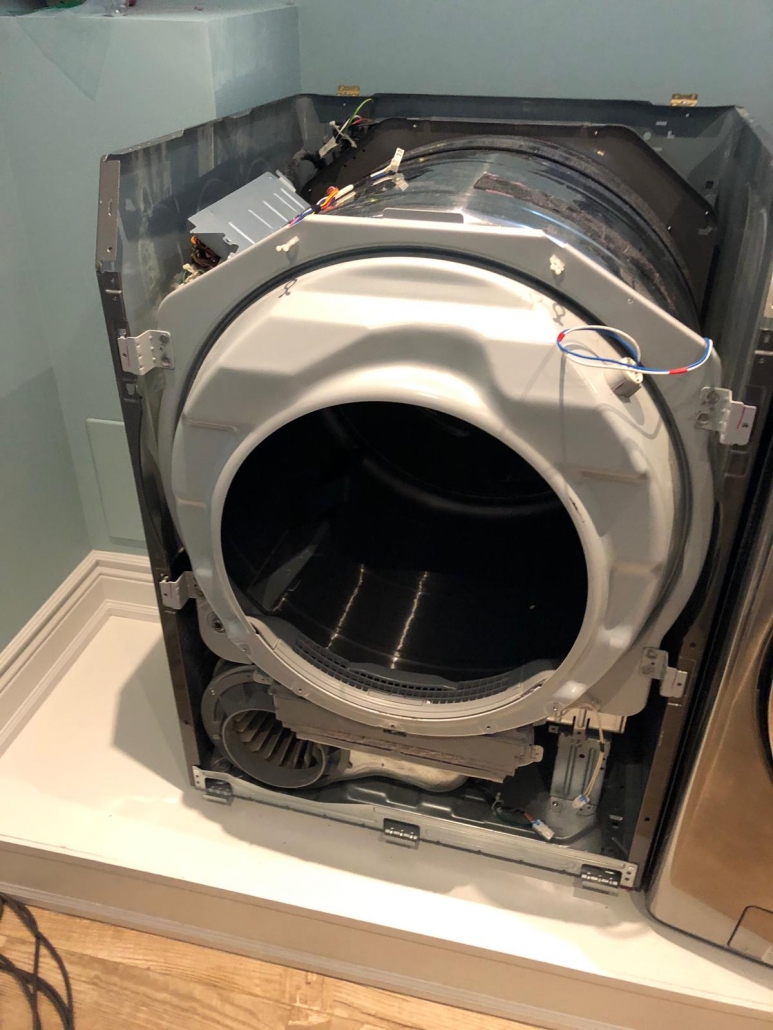
Step4
Discard the top of your dryer out from the cabinet. To avoid straining the brackets, prop the top against something steady. Now you are free to release the front of the dryer. Use your screwdriver to remove the screws. If you can’t detach the front because the switch lid wires are too short, you would have to disconnect the last ones.
Step5
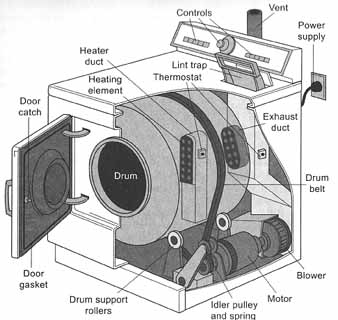
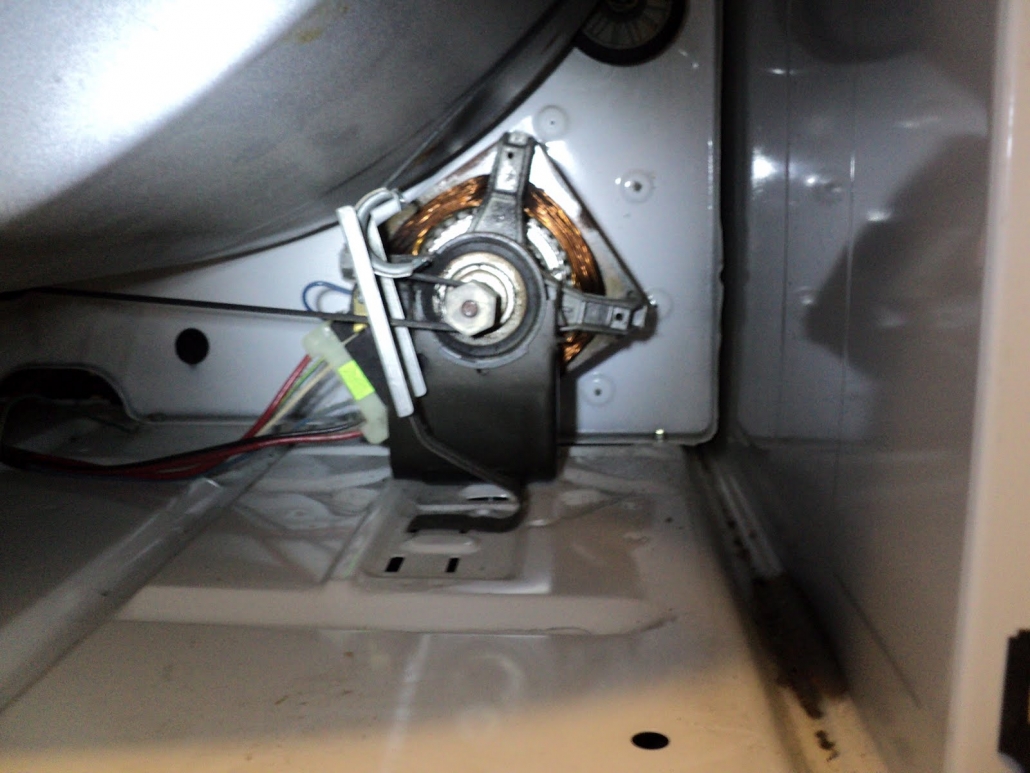
It’s time to remove the old belt out from the drum. You will find the belt looped underneath the idler pulley that has a moving wheel. It is attached to the dryer motor. Crawl under the drum and detach the belt that is fitted to the motor. Just to let you know that the idler pulley can be the spring part with the half circle with no moving component.
Step6
After the old belt has been discarded, you are to clean the inside of the dryer. No need to tell you how much lint, dust and debris are accumulating there, you will see it with your own eyes. Apply your vacuum cleaner to hoover the inside up. And if necessary, use the microfiber to wipe any stubborn residue away.
Step7
It is turn of the new belt to be inserted. You should begin to place the new belt with the groove side down according to the markings around the drum. Hook the belt under the idler pulley and place it over the entire motor. Keep in mind that the idler pulley should be strained towards the belt. It would be good if somebody helps you in this step, thus, you would reach the motor much easier and avoid the hanging down of the drum.
Step8
The next step is to inspect the rear felt on the back end of the drum. Sometimes it can be rolled up that is not appropriate. Also if the rear felt hasn’t fitted properly, use your screwdriver to adjust the rear felt while turning the drum by your hand.
Step9
Reattach the front to the cabinet of the dryer. Please ensure that the small tabs on the bottom of the dryer have to be aligned with the small holes that are on the front.
Step10
Reattach the lint trap, having placed the screws. Now your dryer is ready to be turned on, and thus, to be checked whether it is functioning in a proper way.
We are sure this tutorial of how to change a dryer belt would be much helpful for you. If you still experience difficulties with your whirlpool dryer belt, the certified technicians of Same Day Repair are always at your service to help you rid of them. Same Day Repair is online 24h a day. You are welcome to call us any time to get the professional and quick whirlpool repair service.

